머리말
이제 정말!!! Kingfisher의 주요 기능에 대한 마지막 포스팅입니다. 진짜임;;;; 이번에 소개할 기능들에 대한 스크린샷이 많아서 보시는데 지루하지 않을 거에용ㅎ 아님 말고
아래의 기능을 알아보겠습니다!
- Built-in transition animation when setting images.
- Customizable placeholder and indicator while loading images.
- Extensible image processing and image format easily.
Kingfisher 주요 기능
1. Built-in transition animation when setting images.
이미지를 세팅할 때, 기본 구현된 이동 애니메이션을 사용할 수 있습니다. 아래와 같은 애니메이션들을 기본으로 제공 합니다. 그리고 setImage(with:options:) 메소드의 options 매개변수에 transition과 관련된 option을 넘겨서 간단하게 사용할 수 있습니다.
- none - 이동 애니메이션 없음
- fade(TimeInterval) - 주어진 duration 만큼 서서히 나타남(초단위)
- flipFromLeft(TimeInterval) - 주어진 duration 만큼 왼쪽에서 뒤집으면서 나타남 (초단위)
- flipFromRight(TimeInterval) - 주어진 duration 만큼 오른쪽에서 뒤집으면서 나타남 (초단위)
- flipFromTop(TimeInterval) - 주어진 duration 만큼 위에서 뒤집으면서 나타남 (초단위)
- flipFromBottom(TimeInterval) - 주어진 duration 만큼 아래에서 뒤집으면서 나타남 (초단위)
- custom(duration: TimeInterval, options: UIView.AnimationOptions, animations: ((UIImageView, UIImage) -> Void)?, completion: ((Bool) -> Void)?)
네 이것들 중에서 몇가지만 보도록 할게요.
먼저 fade 입니다.
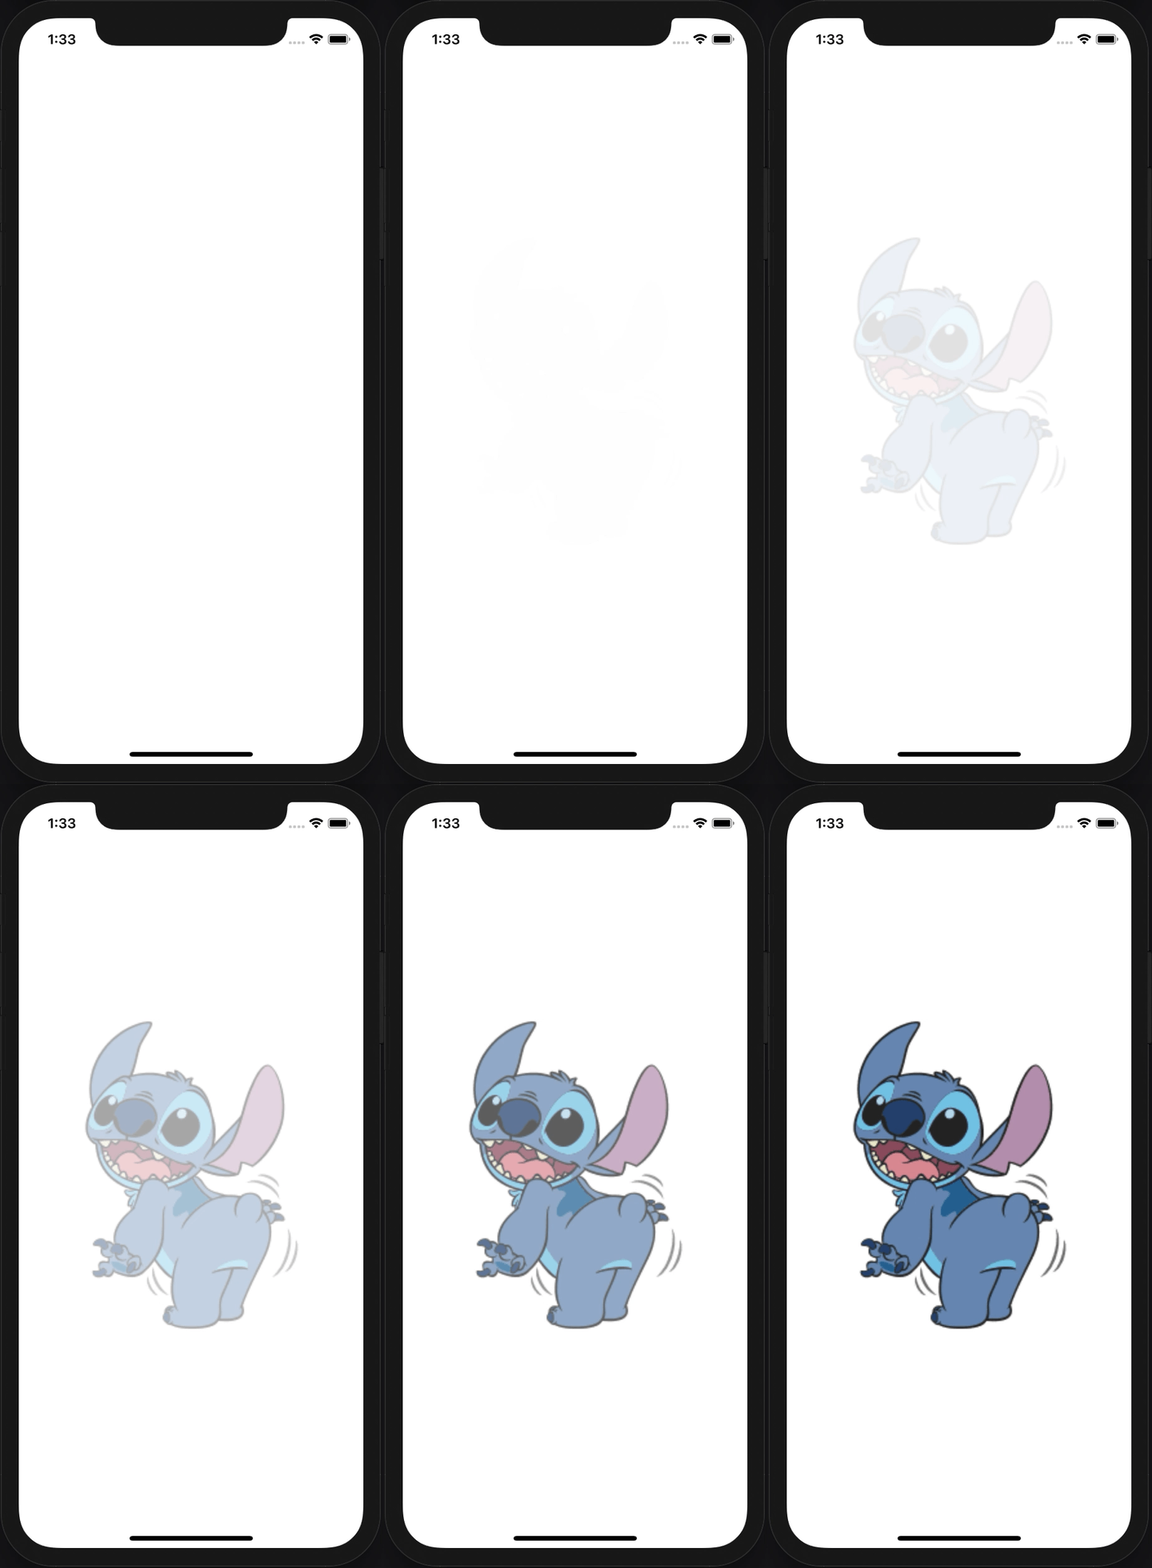
1
imageView.kf.setImage(with: url, options: [.transition(.fade(1))])
그리고 flipFromLeft 입니다.
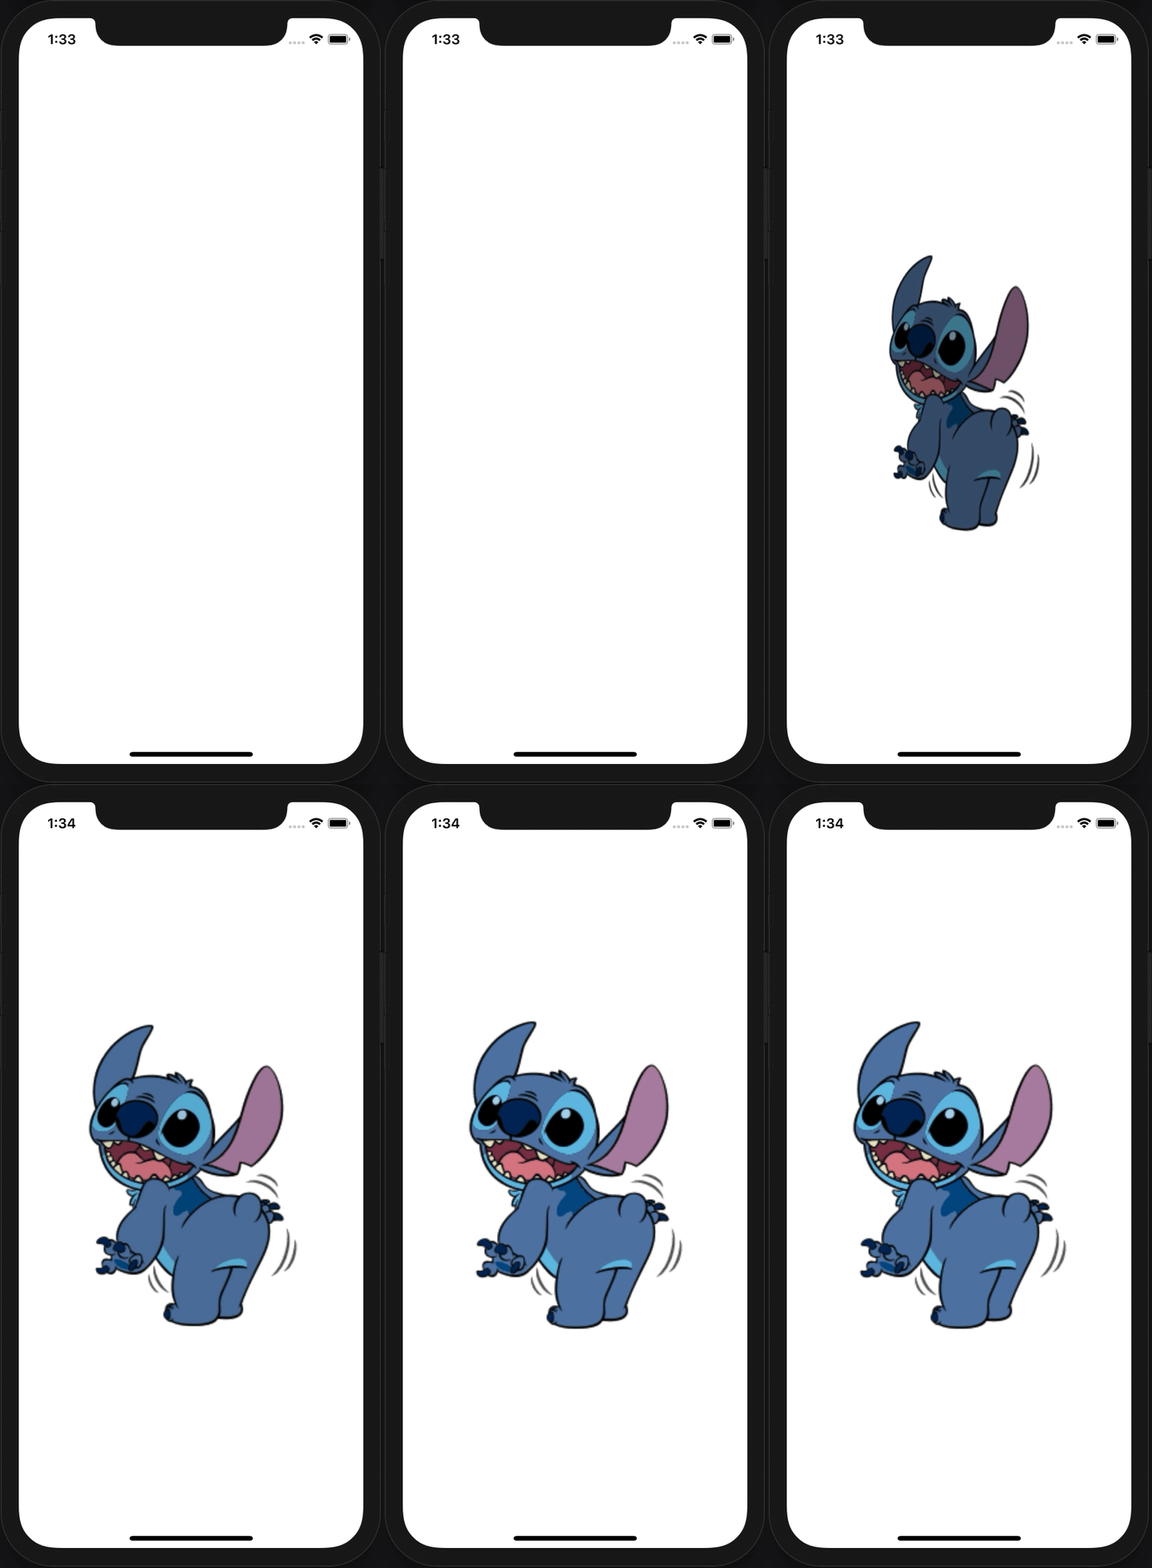
1
imageView.kf.setImage(with: url, options: [.transition(.flipFromLeft(1))])
어떤 식으로 애니메이션이 되는지 감이 오시나요? 근데 사실 fade 말고 좀 구린듯…ㅎ 그래서 개발자가 마음대로 애니메이션을 줄 수 있는 customcase도 존재합니다.
그런데 저는 이 transition이 이미지를 불러올 때마다 되는 줄 알았는데 아니더라고요. 이상하게도 network에서 이미지를 불러올 때만 transtion이 되는 겁니다 이게… 메모리나 디스크에서 이미지를 가져올 땐 transition이 안되었어요. 왜??? 그건 바로~ transition이 되는 기본 조건이 network에서 이미지를 불러올 때만 해당되기 때문이죠..ㅎㅎ 잉? 뭔가 말장난 같지만 정말로 그랬습니다….ㅎㅎ
아니 근데 난 매번 transition을 주고 싶은데 안 되는 건가? -> 땡 아닙니다~
1
imageView.kf.setImage(with: url, options: [.transition(.fade(1)), .forceTransition])
이렇게 options 매개변수에 forceTransition 옵션을 넘겨주면 어디에서 이미지를 불러오건 transition을 줄 수 있습니다.ㅎㅎ!
그럼 대략적인 내부 구현을 알아보겠습니다. 아래 코드는 KingfisherManager 클래스에 있는 retrieveImage 메소드의 completionHandler 부분입니다. 여기서 주목해야할 점은 needsTransition 메소드를 호출하는 guard문인데요, 아무 옵션을 안주면 network에서 이미지를 받아올 때만 transition이 되는 것과 연관이 있겠죠?
KingfisherWrapepr의setImage메소드를 호출 하면 내부에서KingfisherManager클래스의retrieveImage메소드를 호출하도록 계층화가 되어있는건 이전 포스팅에서 같이 알아봤었죠.
1
2
3
4
5
6
7
8
9
10
11
12
13
14
switch result {
case .success(let value):
    guard self.needsTransition(options: options, cacheType: value.cacheType) else {
        mutatingSelf.placeholder = nil
        self.base.image = value.image
        completionHandler?(result)
        return
    }

    /// transition code...

case .failure:
    /// failure handling...
}
needsTransition(options:cacheType:) 메소드 구현부입니다. transition에 대한 option을 검사하는데요, 기본값은 none입니다. 즉 transition에 대한 아무런 옵션도 넘겨주지 않았다면, 3번째 라인에 걸려서 transition을 할 필요가 없다, 즉 false가 반환됩니다.
그럼 이제 default 케이스를 살펴볼게요. 7번째 라인에서는 forceTransition 옵션이 활성화되어 있는지 검사합니다. 이 옵션의 기본값은 false입니다. 그러니까 해당 옵션이 활성화되어있지 않다면 조건문에 걸리지 않겠군요! 그다음 8번째 라인에서는 cacheType이 none인지 확인합니다. network에서 이미지가 도착하면, cacheType은 none이겠죠? 그렇지 않다면 cacheType은 disk나 memory가 될 것입니다. 그래서 network에서 이미지가 온 경우는 transition을 하도록 true를 반환합니다!
이 모든 경우가 아니라면 transition을 하지 않도록 false가 반환 됩니당
1
2
3
4
5
6
7
8
9
10
11
12
private func needsTransition(options: KingfisherParsedOptionsInfo, cacheType: CacheType) -> Bool {
    switch options.transition {
    case .none:
        return false
    #if !os(macOS)
    default:
        if options.forceTransition { return true }
        if cacheType == .none { return true }
        return false
    #endif
    }
}
2. Customizable placeholder and indicator while loading images.
이미지를 로딩하는 동안 커스터마이즈 할 수 있는 placeholder와 indicator를 사용할 수 있습니다. 애플의 Human Interface Guidelines를 보시면 컨텐츠를 로드하거나 데이터 작업을 수행할 때, 유저들에게 정적화면을 보여주지 말고 indicator를 사용해서 앱이 중단되지 않고 잘 실행 중임을 보여주라고 하네요! 즉 우리는 이 기능을 통해 유저들에게 보다 나은 UX를 제공할 수 있습니다. 먼저 placeholder를 사용해 볼게요.
1) placeholder
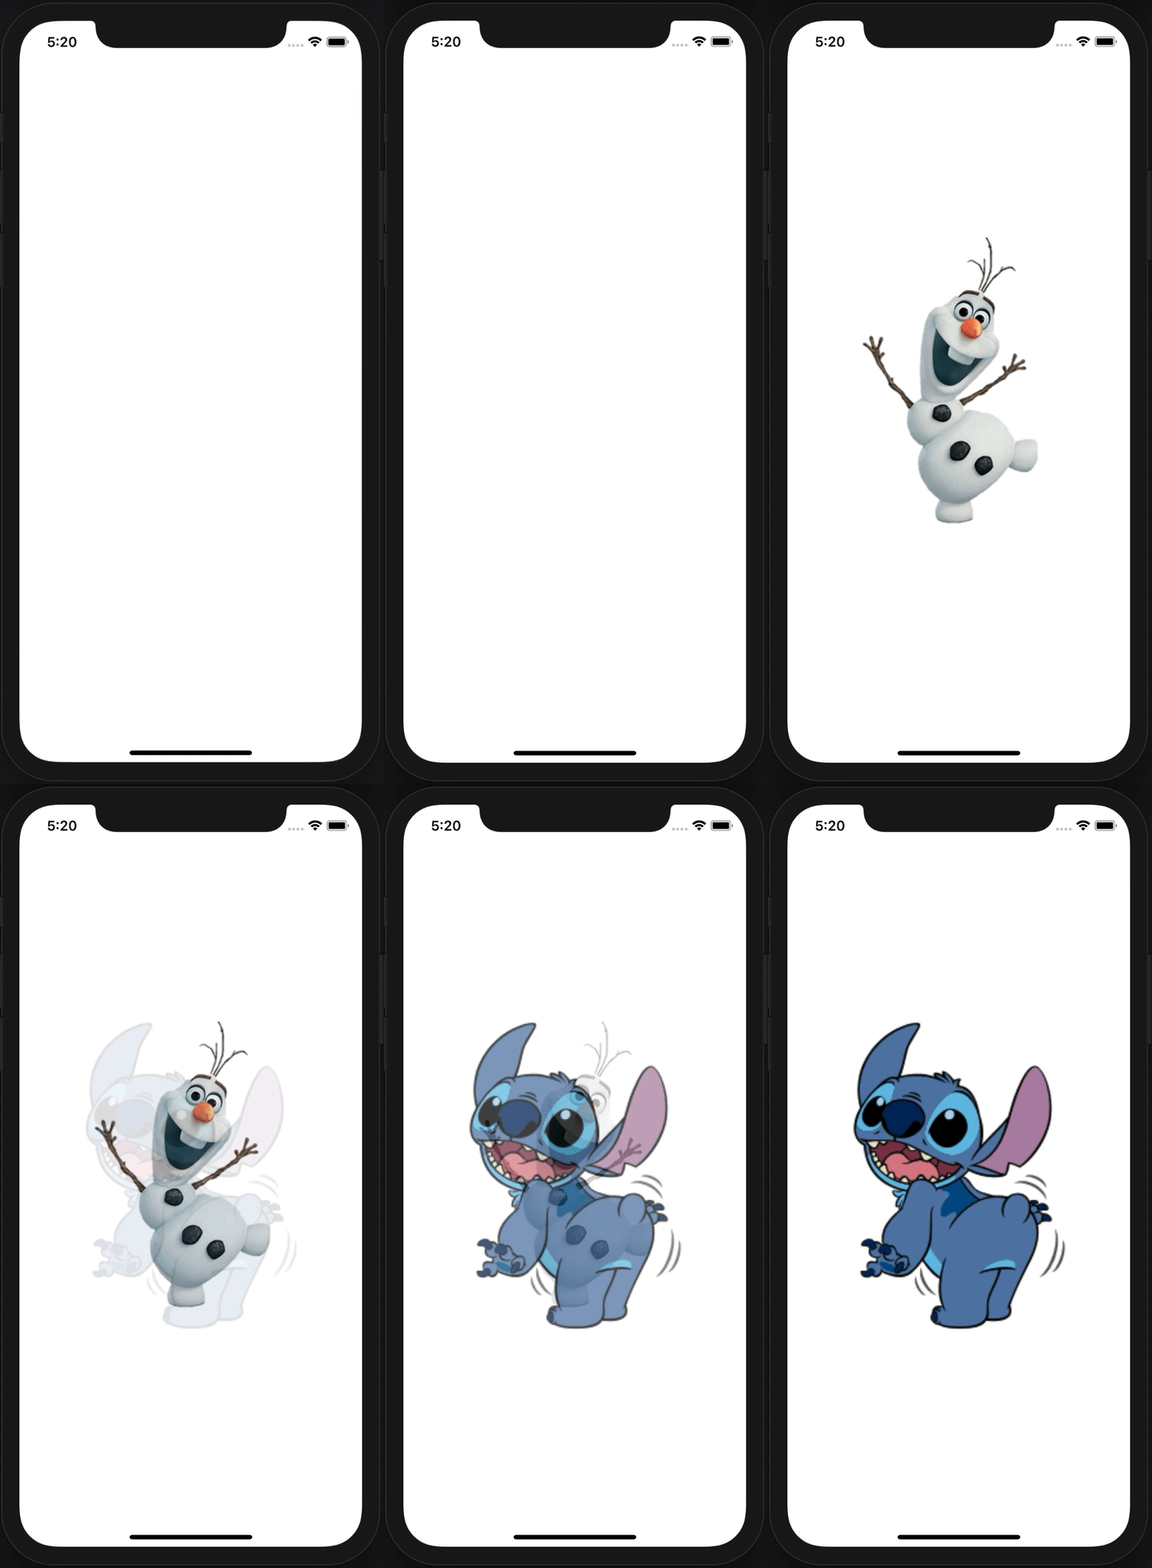
1
2
3
4
5
let image = UIImage(named: "olaf")

imageView.kf.setImage(with: url,
                      placeholder: image,
                      options: [.transition(.fade(2)), .forceTransition])
네 역시 너무 간단하네요. 이 맛에 라이브러리 쓰는 거 아니겠습니까ㅎ 이 코드는 “URL에서 이미지를 받아오면 2초 동안 fade 애니메이션을 하면서 나타나라. 아 근데 받아오기 전 까지 olaf 이미지를 보여줘!” 라는 코드입니다.
여기서 placeholder 매개변수를 살펴보면 Placeholder 타입입니다. Placeholder는 protocol이에요. 대상 imageView에 삽입되고, 삭제될 수 있도록 add(to:), remove(from:) 메소드를 구현해야 하군요. 그리고 KFCrossPlatformImage 의 extension을 통해 Placeholder protocol의 기본구현을 하고 있습니다. KFCrossPlatformImage 는 NSImage,UIImage 를 typealias로 대치한 것이죠? 여러 플랫폼을 지원하기 위함으로 생각이 되네요ㅎㅎ 아무튼 imageView를 통해 넘어온 KFCrossPlatformImageView 의 image를 자기 자신으로 설정하는 것을 볼 수 있습니다. 그리고 삭제될 때는 image를 없애줍니다.
1
2
3
4
5
6
7
8
9
10
11
12
13
14
15
16
public protocol Placeholder {

    /// How the placeholder should be added to a given image view.
    func add(to imageView: KFCrossPlatformImageView)

    /// How the placeholder should be removed from a given image view.
    func remove(from imageView: KFCrossPlatformImageView)
}

extension KFCrossPlatformImage: Placeholder {
    /// How the placeholder should be added to a given image view.
    public func add(to imageView: KFCrossPlatformImageView) { imageView.image = self }

    /// How the placeholder should be removed from a given image view.
    public func remove(from imageView: KFCrossPlatformImageView) { imageView.image = nil }
}
그렇다면 어느 시점에 placeholder가 설정되고 없어질까요? placeholder가 설정되는 시점은 url에 맞는 이미지를 캐시나 네트워크로부터 받아오기 전이고, 이미지를 다 받아온 결과가 success라면 completionHandler에서 placeHolder를 nil로 바꿔줍니다.
base에 이미지가 없고, imageView에 대한 KinfisherWrapper의 placeholder에 아무것도 없다면, 유저가 넘긴 placehodler를 설정해줍니다.
keepCurrentImageWhileLoading 옵션을 활성화해주면 새로운 이미지를 받아오기 전까지 원래 있던 이미지를 유지합니다. 어떻게 보면 이 옵션을 활용해서 placeholder로도 쓸 수 있겠네요ㅎ 근데 굳이?ㅎ
1
2
3
4
5
let isEmptyImage = base.image == nil && self.placeholder == nil
if !options.keepCurrentImageWhileLoading || isEmptyImage {
    // Always set placeholder while there is no image/placeholder yet.
    mutatingSelf.placeholder = placeholder
}
또한 Placeholder protocol을 준수하는 모든 객체는 placeholder가 될 수 있기 때문에 customizable 하다고 볼 수 있습니다. 그 예시로 UILabel에 Placeholder protocol을 적용해보겠습니다.
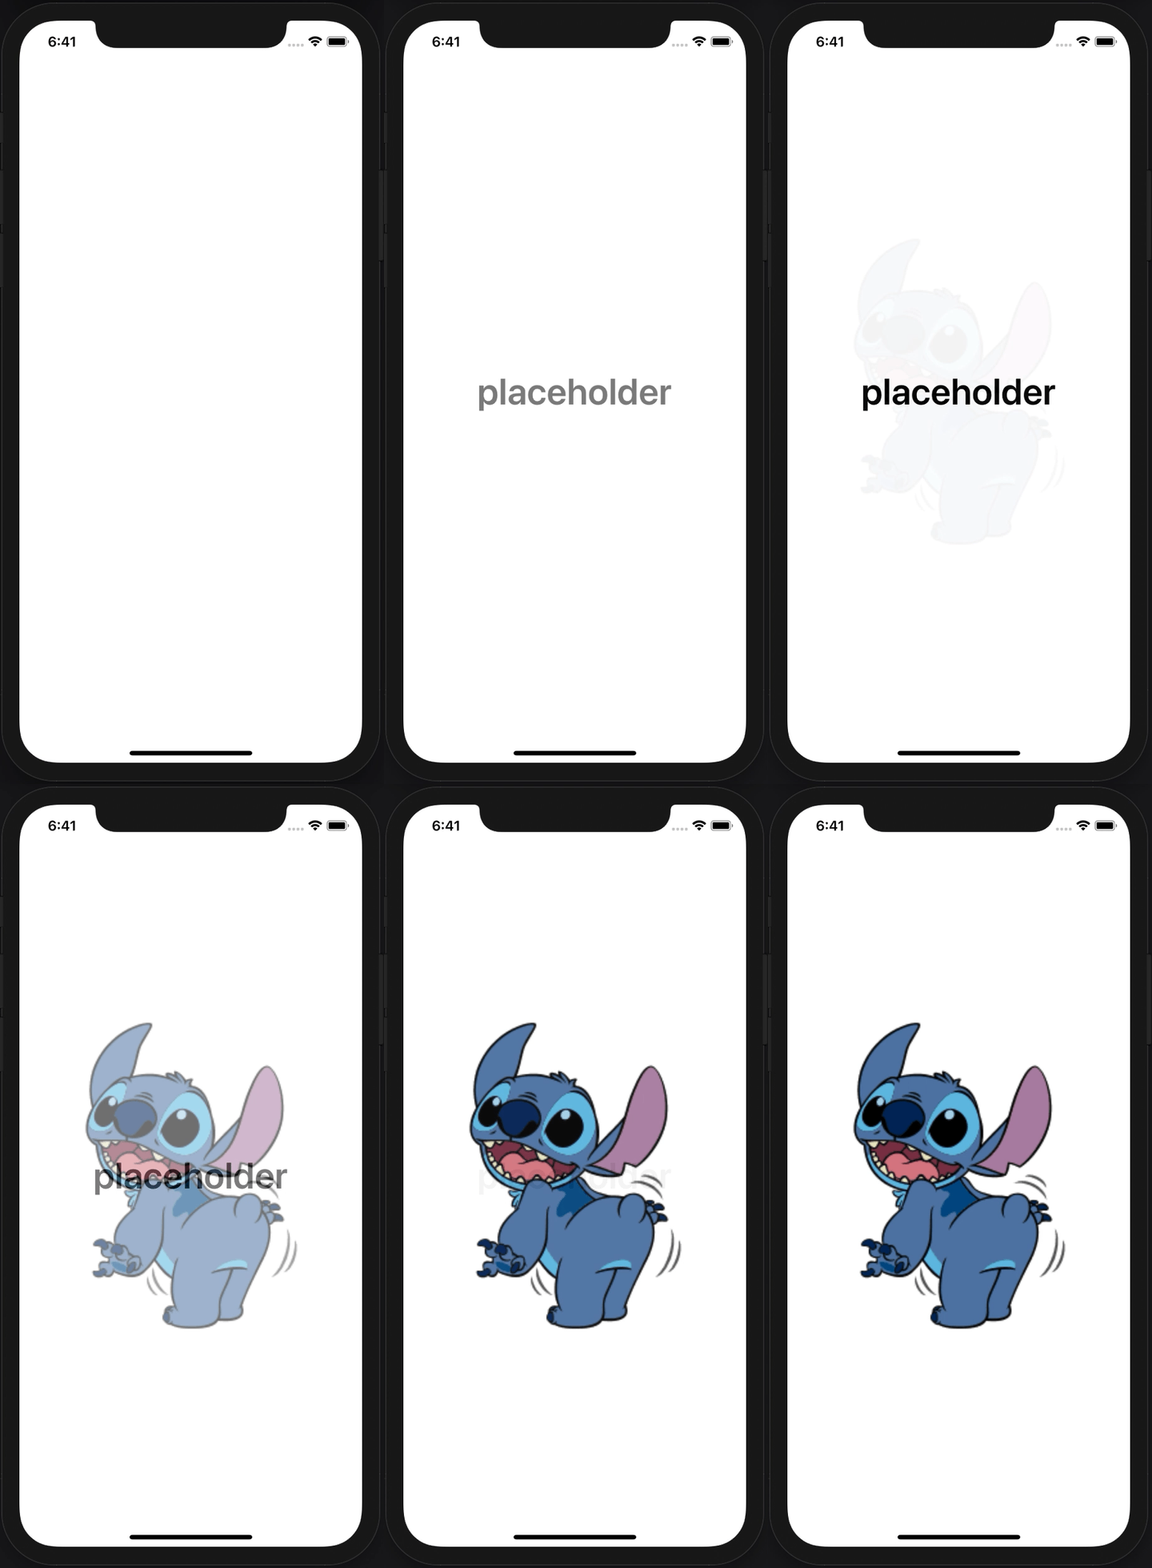
1
2
3
4
5
6
7
8
9
extension UILabel: Placeholder { }

let label = UILabel()
label.text = "placeholder"
label.textAlignment = .center

imageView.kf.setImage(with: url,
                      placeholder: label,
                      options: [.transition(.fade(2)), .forceTransition, .keepCurrentImageWhileLoading])
Placeholder protocol을 UIView 가 채택했을 때 다음과 같은 기본 구현을 제공하기 때문에 UIView를 상속받는 UILabel은 별도의 구현이 필요 없습니다.
1
2
3
4
5
6
7
8
9
10
11
12
13
14
15
16
17
18
extension Placeholder where Self: KFCrossPlatformView {

    /// How the placeholder should be added to a given image view.
    public func add(to imageView: KFCrossPlatformImageView) {
        imageView.addSubview(self)
        translatesAutoresizingMaskIntoConstraints = false

        centerXAnchor.constraint(equalTo: imageView.centerXAnchor).isActive = true
        centerYAnchor.constraint(equalTo: imageView.centerYAnchor).isActive = true
        heightAnchor.constraint(equalTo: imageView.heightAnchor).isActive = true
        widthAnchor.constraint(equalTo: imageView.widthAnchor).isActive = true
    }

    /// How the placeholder should be removed from a given image view.
    public func remove(from imageView: KFCrossPlatformImageView) {
        removeFromSuperview()
    }
}
2) indicator
indicator는 컨텐츠를 받아오는 동안 계속 동작을 해서 사용자에게 앱이 멈추지 않았음을 인지시켜주는 것입니다. 일단 보시죠~ㅎ
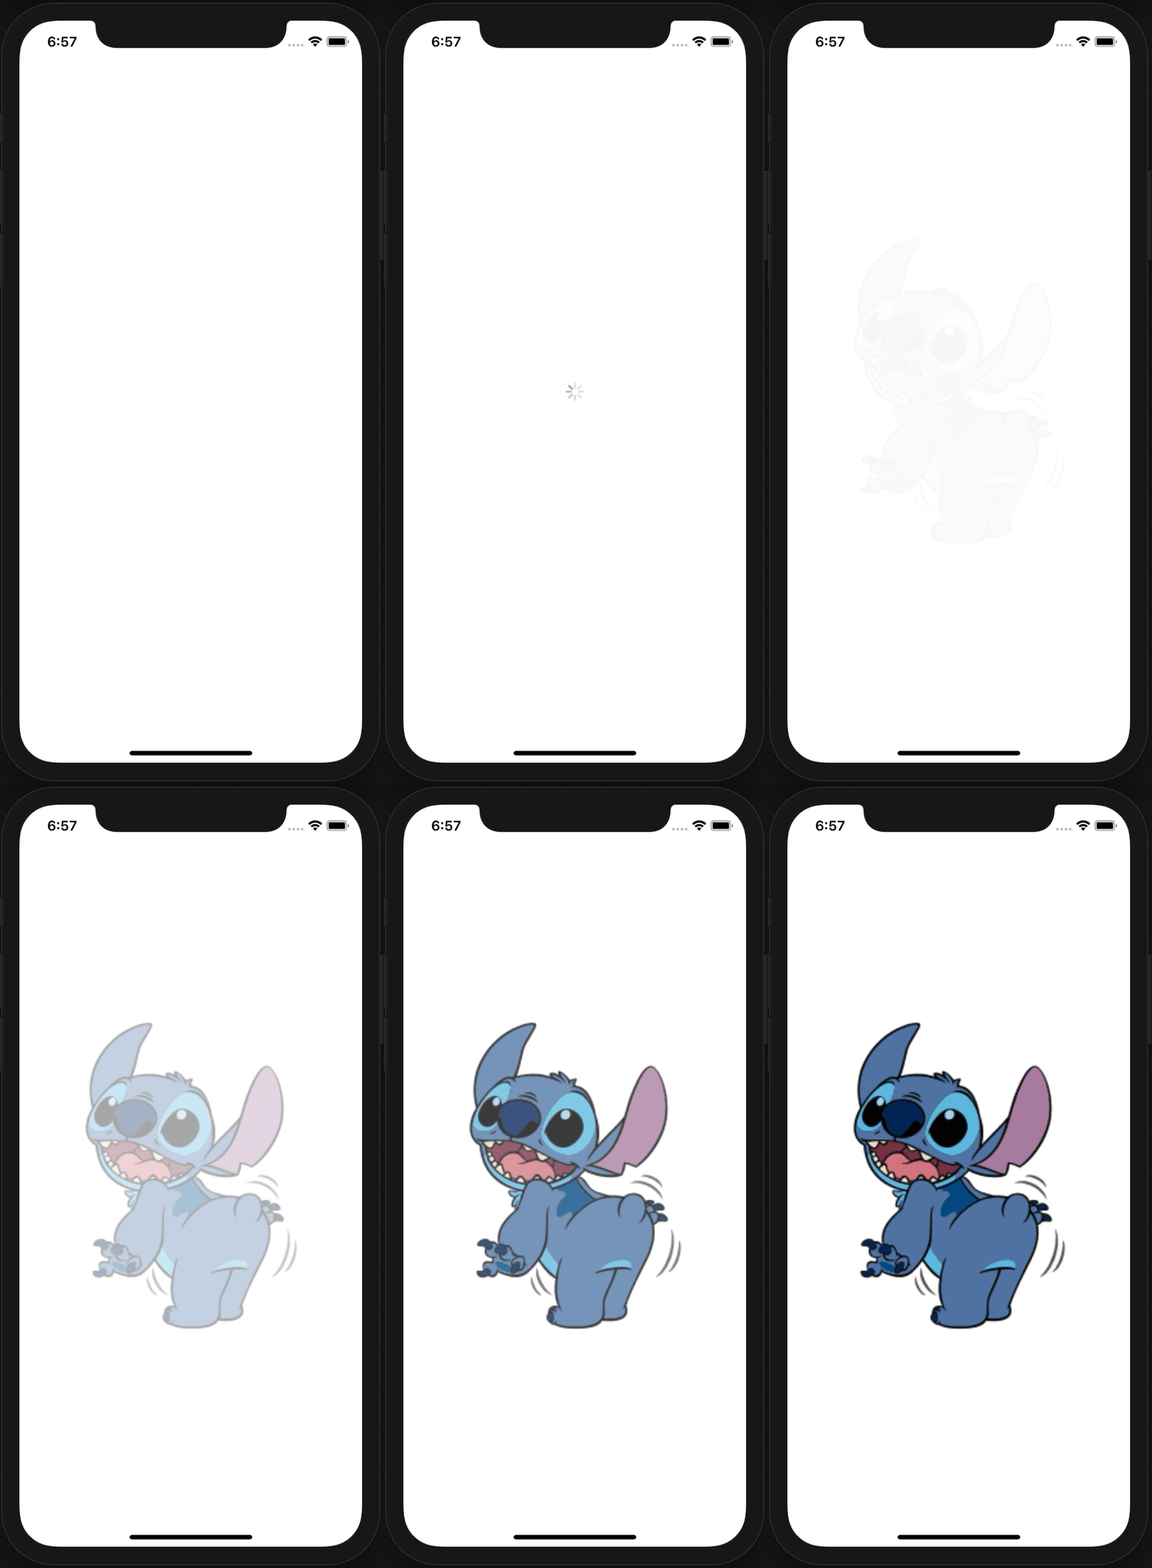
1
2
3
imageView.kf.indicatorType = .activity
imageView.kf.setImage(with: url,
                      options: [.transition(.fade(2)), .forceTransition, .keepCurrentImageWhileLoading])
이미지가 작아서 빠르게 지나갔는데 잘 보시면 맨 처음에 뭔가 빙글빙글 돌아가는 게 보이실거에요. 네! 저게 바로 indicator 입니다. 고작 한 줄의 코드로 유저들에게 좋은 UX를 제공할 수 있어요ㅎ!!
indicatorType 프로퍼티는 IndicatorType enum 타입입니다. 다음과 같은 indicator가 제공됩니다. 예시에 사용한 activity 는 UIActivityIndicatorView 를 사용하고, image(imageData: Data)는 image를 indicator처럼 사용합니다. 그리고 마지막으로 custom(indicator: Indicator)이 제공되는데, Indicatorprotocol을 준수하는 값은 모두 사용 가능합니다.
1
2
3
4
5
6
7
8
9
10
public enum IndicatorType {
    /// No indicator.
    case none
    /// Uses the system activity indicator.
    case activity
    /// Uses an image as indicator. GIF is supported.
    case image(imageData: Data)
    /// Uses a custom indicator. The type of associated value should conform to the `Indicator` protocol.
    case custom(indicator: Indicator)
}
KingfisherWrapper 클래스에는 Indicator 타입의 indicator 프로퍼티가 있는데, indicatorType 프로퍼티의 값을 바꾸면 내부적으로 indicator 프로퍼티의 값이 바뀌게 구현되어 있습니다. 이렇게요.
1
2
3
4
5
6
7
8
9
10
11
12
13
14
15
16
public var indicatorType: IndicatorType {
    get {
        return getAssociatedObject(base, &indicatorTypeKey) ?? .none
    }

    set {
        switch newValue {
        case .none: indicator = nil
        case .activity: indicator = ActivityIndicator()
        case .image(let data): indicator = ImageIndicator(imageData: data)
        case .custom(let anIndicator): indicator = anIndicator
        }

        setRetainedAssociatedObject(base, &indicatorTypeKey, newValue)
    }
}
그리고 placeholder와 마찬가지로 이미지를 불러오기 전에 적용되지만, 이미지를 받아온 결과와 상관없이 이미지를 받아오는 과정이 종료되면 indicator는 멈춥니다. 이것이 placeholder와의 가장 큰 차이인듯하네요..? “아~ placeholder는 이미지를 성공적으로 받아왔을 때만 없어지지만, indicator는 결과에 상관없이 이미지를 받아오는 작업이 끝나면 없어지는구나~” 라고 생각이 됩니다.
placeholder에 이미지 넣기 vs
ImageIndicator사용하기어떻게 보면 둘의 역할이 비슷해 보이네요. 하지만 둘은 소멸 시점뿐만 아니라 분명 다른 점이 있습니다.
placeholder에서 이미지를 표현할 때는 base의 image에 직접 이미지를 넣습니다. 그래서 당연히 base의 contentMode를 따릅니다. 하지만
ImageIndicator는 base의 subView에UIImageView를 추가하는 방식입니다. 또한ImageIndicator의 contentMode는 center입니다.
3. Extensible image processing and image format easily.
확장 가능한 image processing과 image format을 쉽게 지정할 수 있다고 합니다. Kingfisher를 분석하면서 자주 봤던 단어 중 하나가 바로 Extensible인데요, 대부분 protocol을 기반으로 구현되어 있기 때문이라고 생각됩니다. 어떤 객체를 받을지 정하는 것이 아니라 어떤 기능을 하는 객체를 받을 것인가? 이것이 중요하다고 생각되는데요, 이 부분이 Kingfisher의 확장성을 높여주는 것이 아닐까요?ㅎ 이 얘기를 왜 하느냐? 바로 ImageProcessor도 protocol이기 때문이죠.
1
2
3
4
5
6
7
8
public protocol ImageProcessor {
    var identifier: String { get }

    @available(*, deprecated, message: "Deprecated. Implement the method with same name but with `KingfisherParsedOptionsInfo` instead.")
    func process(item: ImageProcessItem, options: KingfisherOptionsInfo) -> KFCrossPlatformImage?

    func process(item: ImageProcessItem, options: KingfisherParsedOptionsInfo) -> KFCrossPlatformImage?
}
그래서 위의 요구사항만 충족한다면, 어떤 객체라도 processor로 들어갈 수 있는 것입니다.
아니 근데 저는 processing 한 image랑 format이랑 무슨 상관인데 엮여있는거지? 라는 생각이 들었어요. 그래서 cheat sheet를 들여다 봤더니 이런 글이 있었어요. RoundCornerImageProcessor 를 사용해서 image의 테두리를 깎았다고 칩시다. 깎은 부분을 투명 처리 하고 싶은데, 이를 PNG가 아닌 JPEG로 저장하게 되면 깎인 부분이 메꿔지는 불상사가 발생하겠죠? 그래서 투명 처리를 강제하기 위해서 image format을 PNG로 강제할 수 있다고 합니다. 이게 뭔소리여? 아 그럼 일단 보시죠~~
1
2
imageView.kf.setImage(with: url),
                      options: [.processor(RoundCornerImageProcessor(cornerRadius: 100))])
이렇게 이미지 테두리를 깎아줬더니…

테두리가 예쁘게 깎인 스티치입니다. 그런데 메모리 캐시를 비우고 동일한 요청을 다시 보내면?

음??? 아 싫어… 이게 바로 투명 부분이 있는 이미지를 JPEG로 저장했을 때의 문제입니다. 그래서 디스크에 저장할 때 PNG로 저장을 해야 하는데, 이를 어떻게 하느냐? 디스크에 저장하는 시점에서 뭔가를 해줘야 하는데요… 디스크에 저장하려면 기본적으로 직렬화를 해줘야 합니다. PNG로 직렬화 하고싶다면 UIKit에서 제공하는 pngData() 메소드를 사용하면 됩니다.
이 부분을 Kingfisher에서 더 쉬운 방법으로 지원하는데요, CacheSerializer 프로토콜을 준수하는 FormatIndicatedCacheSerializer구조체를 통해서 원하는 format으로 이미지를 저장할 수 있습니다. 해당 구조체는 ImageFormat 타입의 imageFormat프로퍼티를 가지는데, 생성자를 통해 이 프로퍼티의 값을 정해줄 수 있습니다.
1
2
3
4
5
6
7
8
9
10
11
12
13
public protocol CacheSerializer {

    /// 이미지 객체를 직렬화 하는 메소드
    func data(with image: KFCrossPlatformImage, original: Data?) -> Data?

    /// 직렬화된 Data에서 이미지를 얻는 메소드
    func image(with data: Data, options: KingfisherParsedOptionsInfo) -> KFCrossPlatformImage?

    /// 역직렬화된 Data에서 이미지를 얻는 메소드
    @available(*, deprecated,
    message: "Deprecated. Implement the method with same name but with `KingfisherParsedOptionsInfo` instead.")
    func image(with data: Data, options: KingfisherOptionsInfo?) -> KFCrossPlatformImage?
}
1
2
3
4
5
6
7
8
9
10
11
12
public enum ImageFormat {
    /// The format cannot be recognized or not supported yet.
    case unknown
    /// PNG image format.
    case PNG
    /// JPEG image format.
    case JPEG
    /// GIF image format.
    case GIF

    /// ...
}
우리는 PNG로 저장하고 싶기 때문에 아래와 같이 options에 FormatIndicatedCacheSerializer의 png 프로퍼티를 넘겨주면 됩니다.
1
2
3
imageView.kf.setImage(with: url,
                      options: [.processor(RoundCornerImageProcessor(cornerRadius: 100)),
                                .cacheSerializer(FormatIndicatedCacheSerializer.png)])
네트워크에서 이미지를 받아와서 프로세싱을 완료하고 디스크에 저장할 때 위에서 소개한 CacheSerializer protocol의 data(with:original:) -> Data? 메소드를 통해 직렬화됩니다. 아래 코드는 CacheSerializer protocol을 채택한 FormatIndicatedCacheSerializer의 data(with:original:) -> Data? 메소드의 내부입니다. 주어진 ImageFormat에 맞게 직렬화하는 모습을 볼 수 있습니다.
1
2
3
4
5
6
7
/// imageFormat: ImageFormat
switch imageFormat {
    case .PNG: return image.kf.pngRepresentation()
    case .JPEG: return image.kf.jpegRepresentation(compressionQuality: jpegCompressionQuality ?? 1.0)
    case .GIF: return image.kf.gifRepresentation()
    case .unknown: return nil
}
그래서 다시 불러오더라도 다음과 같이 예쁘게 불러올 수 있습니다~~

cacheSerializer옵션을 활성화해주지 않아도DefaultCacheSerializer.default라는 기본값을 가집니다. 이 serializer는 이미지의 header를 분석해서 format을 알아내고, 해당 format으로 저장합니다. 이 말은 format이 JPEG인 이미지를 받아오면 JPEG로 저장이 된다는 것입니다. 그래서 위의 이미지를 processor를 통해 테두리를 깎았음에도 불구하고, JPEG로 저장되기 때문에 투명 처리된 부분이 흰색으로 채워진 것입니다.이미지 포맷에 대한 정보는 여기를 참고해주세요!
와….. 드디어 주요 기능들을 모두 살펴봤습니다… 너무 힘드네요…
많이 부족한 실력으로 라이브러리를 까보다 보니 얼렁뚱땅 넘어간 부분도 많고 정확하지 않은 부분도 많지만 읽어주셔서 감사합니다ㅎㅎ 저도 이 라이브러리를 분석하면서 어떻게 하면 코드를 효율적으로 짤 수 있는지, 확장성은 어떻게 고려하는지 등을 배울 수 있었습니다. 좋은 시간이었어요ㅎㅎㅎㅎㅎ
그럼 다음 포스팅 때 만나요~~~
이 글은 개린이의 지식을 바탕으로 작성된 글입니다. 최대한 옳은 정보를 담으려고 노력하겠으나, 그럼에도 틀린 부분이 있을 수 있습니다. 혹여 발견하시면 댓글로 피드백 주시면 감사하겠습니다.
개린이의 관점에서 Kingfisher 살펴보기 시리즈